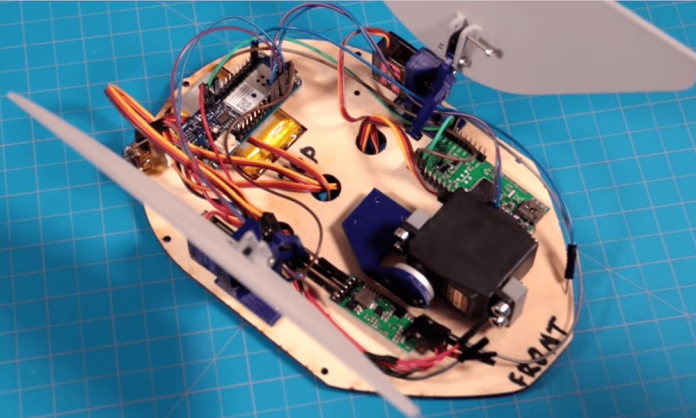
Are you a fan of Inspector Gadget, the famous detective who has an array of high-tech gadgets at his disposal? If so, you may have always dreamed of having your own DIY Inspector Gadget Hat Servo. This futuristic headgear is not only cool but also very practical, allowing you to control various devices with just a flick of a switch. In this article, we will show you how to make your own Inspector Gadget Hat Servo, step-by-step.
What You Will Need
Before we get started, let’s go over the materials and tools you will need to make your own Inspector Gadget Hat Servo:
A hat with a brim (preferably a baseball cap)
A small servo motor
Jumper wires
Arduino Nano
Breadboard
9V battery and battery holder
USB cable
Glue gun
Small screwdriver
Wire strippers
Multimeter
Step-by-Step Instructions
Attach the Servo Motor to the Hat Brim
The first step is to attach the servo motor to the hat brim. Use a glue gun to glue the servo motor to the underside of the brim, making sure that the motor shaft is facing forward.
Connect the Servo Motor to the Arduino
Next, you will need to connect the servo motor to the Arduino Nano using jumper wires. The servo motor has three wires: black, red, and yellow. Connect the black wire to the GND pin on the Arduino, the red wire to the 5V pin, and the yellow wire to pin D9.
Connect the Arduino to the Breadboard
Now, you need to connect the Arduino Nano to the breadboard using jumper wires. Connect the GND pin on the Arduino to the negative rail on the breadboard, and the 5V pin to the positive rail.
Connect the Battery to the Breadboard
Connect the battery holder to the breadboard by connecting the positive wire to the positive rail and the negative wire to the negative rail.
Connect the Servo Motor to the Battery
Finally, you will need to connect the servo motor to the battery. Connect the black wire on the servo motor to the negative rail on the breadboard and the red wire to the positive rail.
Upload the Code to the Arduino
Now that the circuit is complete, it’s time to upload the code to the Arduino Nano. You can use the Arduino IDE to write and upload the code. Here is an example code you can use:
#include <Servo.h>
Servo myservo;
void setup() {
myservo.attach(9);
}
void loop() {
myservo.write(0);
delay(1000);
myservo.write(90);
delay(1000);
myservo.write(180);
delay(1000);
}
This code will make the servo motor move back and forth, demonstrating that it’s working properly.
Test Your Inspector Gadget Hat Servo
Once the code is uploaded, it’s time to test your Inspector Gadget Hat Servo. Put on your hat and use the small screwdriver to adjust the position of the servo motor until it’s facing in the direction you want. Then, use the switch on the Arduino Nano to control the servo motor. Congratulations, you’ve just made your own Inspector Gadget Hat Servo!
Conclusion
In conclusion, making your own Inspector Gadget Hat Servo is a fun and rewarding project that anyone can do with a little bit of electronics knowledge. With just a few materials and tools.


![Step-by-Step Guide to Activate Bet Plus on Your Mobile Device [2023] Bet plus](https://foritnews.com/wp-content/uploads/2023/07/Bet-plus-100x70.jpg)


